Before you take a great photo of the Milky Way there are some things you should know. First, make sure there is no light pollution. The Milky Way appears very dimmed by light pollution. Avoid this by traveling to a rural area away from urban lights. You have many options, including national parks.
Wide angle lens
When photographing the Milky Way, wide angle lenses are your best bet. A fast wide angle lens that has an f-stop of at least f2.8 will capture more light. Although f4 lenses will also work, f2.8 lenses will capture twice as much light as f4 lenses, which will mean you can use a lower iso and a shorter shutter speed to capture the Milky Way with less streaking.
Wide angle lenses are best for taking photos of the Milky Way as they give you the best view possible of the starry night skies. Wide angle lenses have their limitations. A wide lens will not allow you to capture the Milky Way.
Low focal length
A wide aperture lens with a low focal length and a narrow aperture is the best way of capturing the Milky Way. Low-focal length lenses tend to be quicker than others. This is especially useful for dark nights. The 18-55mm F/3.5-5.6 lens is included in most camera sets. However, this lens is too slow. You can reduce this number by adjusting your camera's settings.
The time of the year is another thing to consider. You want to make sure the Milky Way is visible, and if you're shooting on a cloudy night, the Milky Way will be much more difficult to photograph. There are several ways to get amazing shots of the Milky Way. First, be sure to check the weather forecast. Avoid shooting in areas with excessive light pollution. The city lights can obscure the Milky Way.
Long exposure time
To take a picture of the Milky Way, you'll need to use a long exposure time of around 30 seconds. Also, a tripod is necessary as even a slight breeze can shake the camera. You can also try a bulb mode, which allows for a longer exposure than 30 seconds.
The best way to capture the milky sphere is to be strategic about where you are going. It's not recommended to take photographs of the Milky Way from large cities or other crowded areas. The Milky Way will be obscured by light pollution, which can come from nearby buildings and lights.
Dark skies
Choose a location with dark skies to get a better view. Avoid parks and urban areas where streetlights often illuminate the sky. During the summer, the core of the Milky Way is visible to the south. The faint white streaks that appear across the sky can be captured by pointing your camera towards the south. A red light can be used to preserve night vision. Use a remote shutter release on your camera to minimize camera shake.
It can be difficult for people to see dark skies. There are many resources that will help you locate dark skies. One such resource is the International Dark Sky Association. The International Dark Sky Association works to protect and preserve the night sky. Visit the Dark Sky Association to find out more about dark sky photography.

Post-processing
Post-processing is important if you wish to capture the Milkyway. Each photographer will have their own preferences. Some prefer to postprocess their images using blue tones. Other prefer purple or more saturated colours. You can choose your own style.
First, you need a dark, clear sky. Artificial light can create the illusion of dark, but it is not always possible to capture a clear image without too much noise. To avoid this, try finding a spot away from the city. It will guarantee that your photo looks great.
FAQ
Light Room can be used to enhance your photographs.
To ensure that you get the best photos for your project, it is best to start early. It's better to take as much as possible, then select the best.
Lightroom allows this because it lets you see the effects of different settings on each photo. These settings can be adjusted on the fly without having to go back into Photoshop. This allows for quick experimentation with what looks good or not.
What makes a camera bag good?
Camera bags are essential for protecting your gear during travel. Consider these factors when selecting a bag.
-
Sizing: A large bag will hold your camera and other accessories. You shouldn't buy more than what you actually need.
-
Durability: Buy bags made of durable materials like canvas, nylon or leather. Avoid using plastic bags or fabric bags.
-
Protection: Make sure your bag provides protection against dust, dirt, moisture, and scratches.
-
Organization: Consider organizing your gear by type to easily access your needs. You could, for example, place your lenses in one area, your memory card in another and your battery charge in yet another.
-
Comfort: A shoulder strap is a better choice than a handbag for shooting. Comfortable designs with padded shoulders are also recommended.
-
Price: Check around to find the best prices. Many brands offer their products at discounted prices. This can be a huge advantage.
-
Warranty: Ask if the company offers a warranty on its products. You will know who to call if your bag gets damaged.
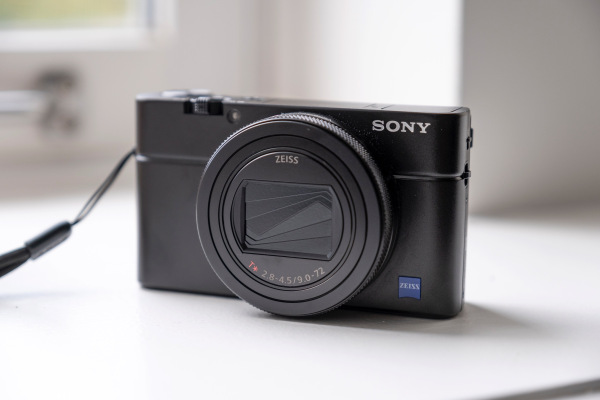
Cameras available for purchase
You can find many places online to buy cameras. B&H Photo Video is a well-respected retailer. Their knowledgeable staff can answer any questions that you might have.
B&H ships quickly and securely to make it easy for you to get your order to your door.
This video will explain how to shop for cameras.
Statistics
- The second easiest way to get blurry photos 100% of the time is to use a cheap filter on the front of your lens. (photographylife.com)
- This article received 13 testimonials, and 100% of readers who voted found it helpful, earning it our reader-approved status. (wikihow.com)
- While I cannot prove that all of those spots were not sensor dust, the photo was taken during a heavy snowstorm…so I guess that 99.8% of the spots are snowflakes. (bhphotovideo.com)
- That's the easiest way to get blurry photos 100% of the time. (photographylife.com)
External Links
How To
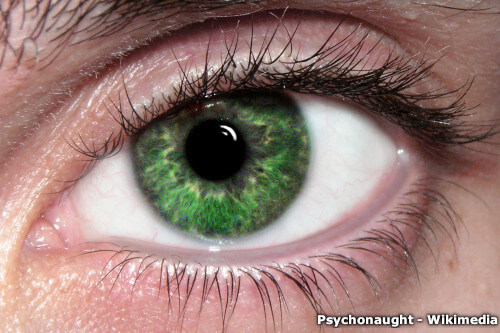
How to take macro shots in photography
Macro photography refers to the ability capture small objects like flowers, insects, or people close up. The term "macro" comes from the Greek word makros (makros), meaning large. It is possible to capture images of very close objects if you have a lens with a focal range greater than 50mm.
A macro lens of high quality should have a large working distance and an aperture fast enough to produce sharp images. It is important to avoid motion while taking photos. Anything that moves during exposure may blur your image.
Here are some ways to get great macro photos
-
Use a tripod. Set up a table or chair so you don’t knock anything over. You'll be less likely to move while you shoot.
-
Choose the right lighting. Macro lenses usually come with built in light filters. But if you don’t, you can always buy one. It helps to prevent overexposure.
-
Be patient! Shooting macros takes practice. Even though you might only see one tiny bug or flower at a time, it is worthwhile to continue shooting until you capture it.
-
RAW is the best format for shooting. RAW files have more data than JPEGs. They can store more detail. RAW files can be edited later and allow for more detail such as cropping and color correction.
-
It's important to remember the background. The background can be as important as the foreground. Include it in your shot.
-
Keep learning.